


Create and manage campaigns in Nippy
Campaigns are marketing activities that lead to a specific goal. Campaigns consist of one or more projects. Campaign examples are any event, integrated PR outreach, or advertising campaign. A combination of projects like press release, social media ads, event management, email outreach, or content production make up the campaign. Projects in turn can consist of multiple tasks that ensure high quality marketing execution.
Nippy Marketer provides many easy opportunities for campaign development and orchestration.
In this article you will learn:
- Campaign elements
- How to create campaigns in Nippy
- How to add projects to a campaign
- How to launch campaign in the team workflows
- Complete a campaign
- Save campaign as a template
- How to reuse a campaign
- How to change campaign periods in Nippy
- How to add a campaign to a program
- How to add a goal to a campaign
- How to add budget and manage costs of a campaign
- How to assign campaign to a campaign manager
Campaign elements
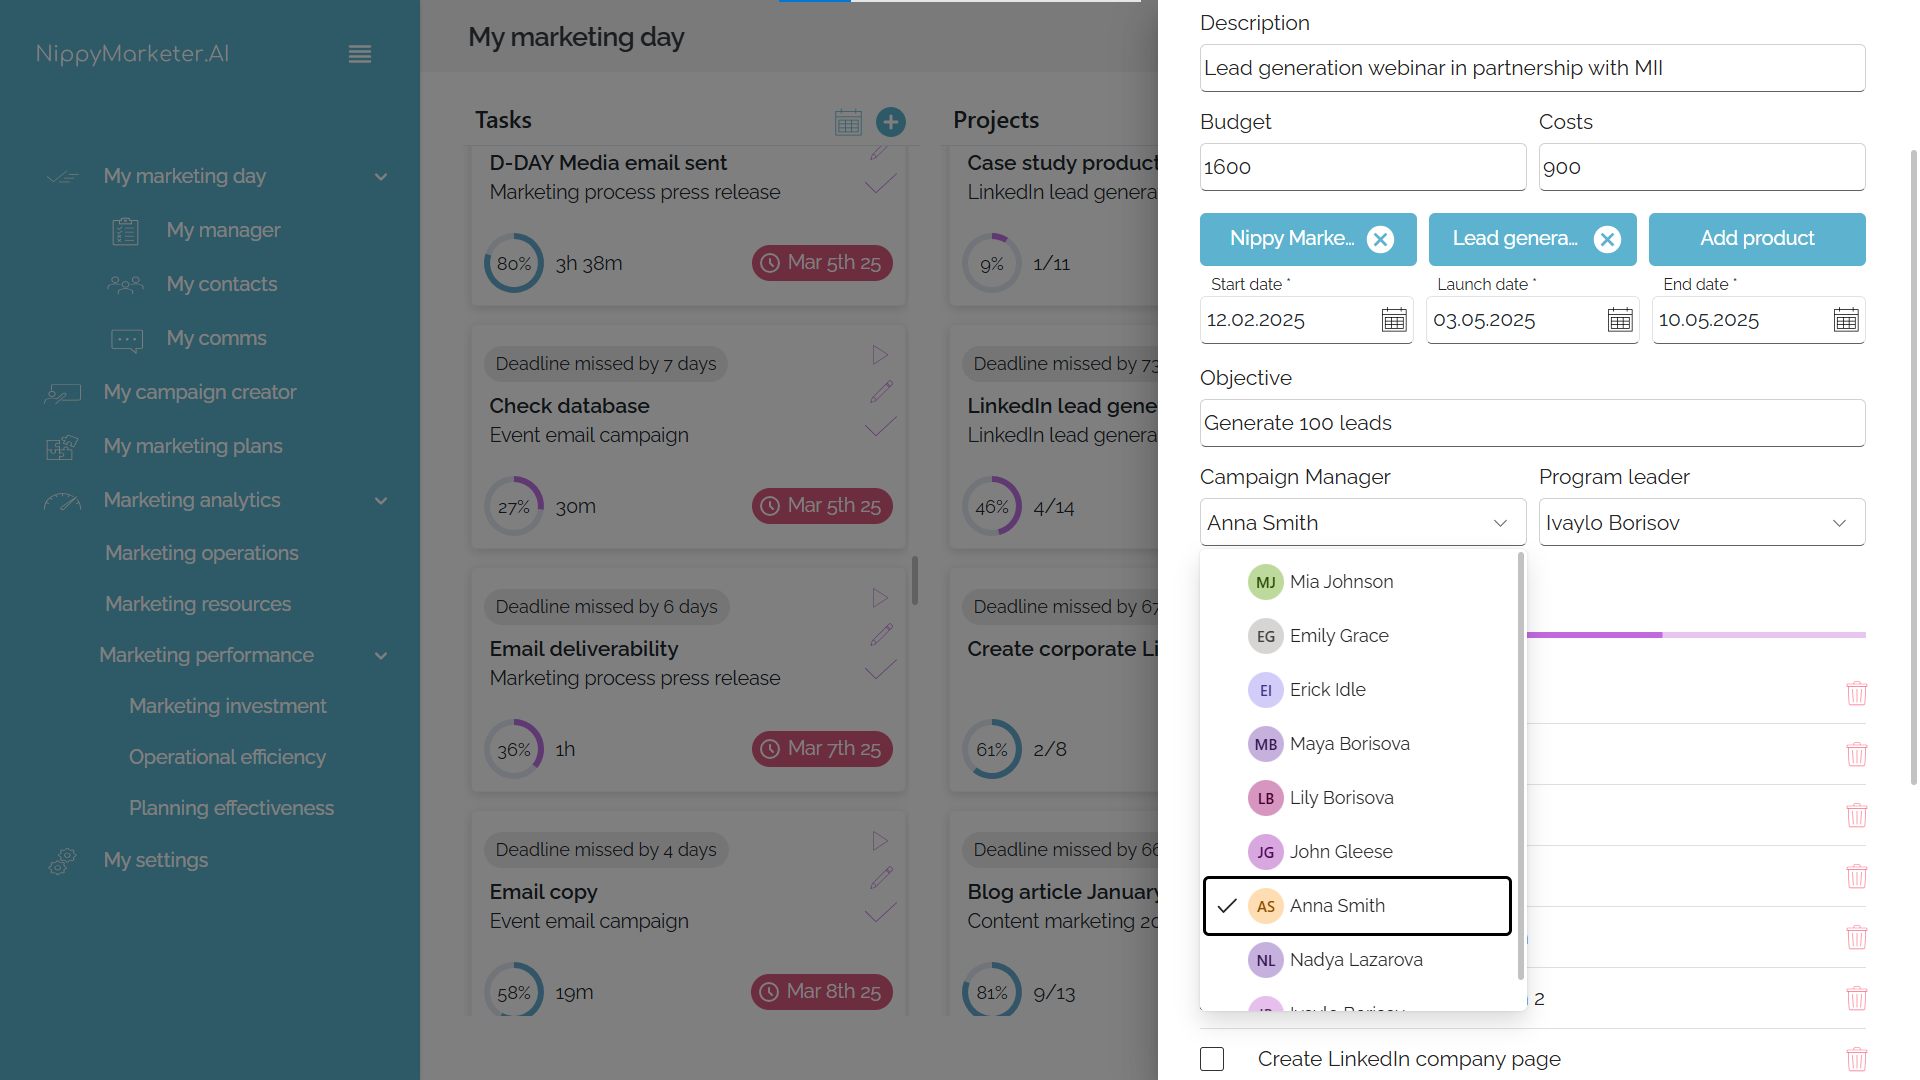
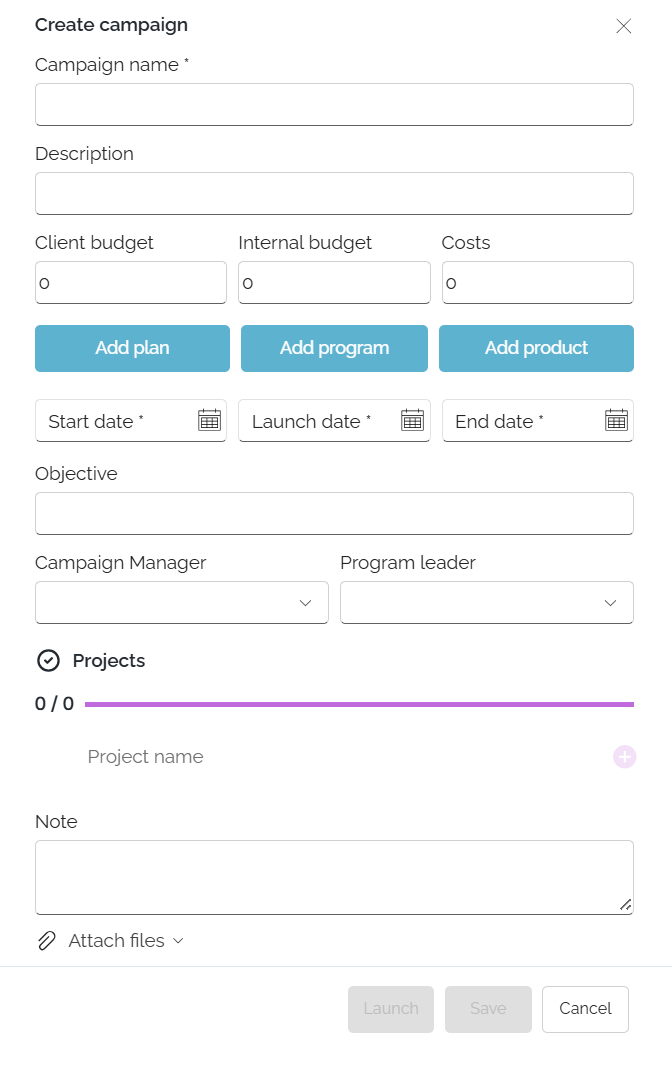
In every campaign you can define following elements:
- Name (required field) - the name of the campaign. Try to make it short and clear.
- Description - add short and clear description of the campaign.
- Budget - the budgeted amount in the chosen currency for this campaign.
- Costs - these are the actual costs under this campaign. Can be set manually, or can be calculated as the sum of the costs of the projects under this campaign. If you want this calculated, click on the calculate icon
 that appears on hover above the costs input field.
 - Add plan - choose the plan that you want this campaign to be part of.
- Add program - choose the program or create new program that you want this campaign to be part of.
- Add product - choose the product you want this campaign to be part of.*
- Start date - the date on which the work on this campaign needs to start. This is a required field to launch the campaign.
- Launch date - the date of the launch of the campaign. This is a required field to launch the campaign.
- End date - this is the planned end date of the campaign. This is a required field to launch the campaign.
- Objective - define objective for this campaign.
- Campaign manager - this is the manager of the campaign.
- Program leader - this is the program manager of the campaign's program.
- Projects - the list of projects under this campaign.
- Notes - free text field for notes and files on this campaign.
- Save button - this saves the campaign as a draft and closes the dialog box.
- Launch button - this saves the campaign and pushes it in the workflows for all responsible in the projects and tasks under this campaign.
Types of campaigns in Nippy
Depending on your marketing workflows you can determine and manage the following campaigns types in Nippy:
- Draft campaigns - these are the campaigns that are not launched/active and not part of the Nippy algorithms and not visible in My Marketing Day dashboard. These campaigns need to be launched to become part of your workflows.
- Active campaigns - these campaigns are launched. This means that the campaigns and their projects and tasks are part of the team's workflows and they appear in the user's My marketing day dashboard. Campaigns can be launched in many ways, including when a project or task, part of the campaign is launched.
- Campaigns in progress - campaigns might be active/launched but its actual execution might not have still started. The system will set a campaign to be in progress when you start work on a task, part of this campaign by clicking play
 in a task.
 - Paused campaigns - any campaign can be worked on, paused, and restarted multiple times. When a campaign is paused, the works on it stops for everyone and the campaign, its projects, and tasks are removed from the My Marketing Day dashboard. A paused campaign can be relaunched by launching it again.
- Campaign templates - these are campaigns saved as templates that can be reused and saved as drafts or launched as new ones.
The different types of campaigns can be located and managed in the My manager/Grid.
How to create campaigns in Nippy
You can access the campaign form from following places:
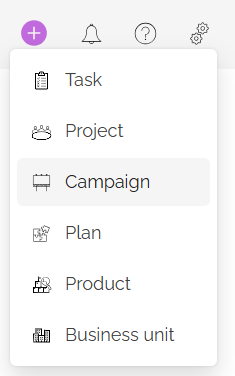
- The Power button always visible in the header row of Nippy. Click on the button and choose Campaign. Fill-in the fields in the campaign form. If you want the campaign to be launched, click LAUNCH (campaign dates are required fields); if you want to save as draft and launch in future, click SAVE.
- Create campaign in marketing dashboard. Go to My marketing day and Click the plus icon above the campaigns column.

- Go to Campaign creator and click on the plus icon to open the campaign dialog box.
Add projects to a campaign
Projects are the constructive elements of a campaign. In marketing terms these could be communications tactics - email campaign, press release outreach, digital campaign or anything requiring a sequence of activities - content production, ad production, information materials, landing page, etc. A campaign must include at least one project as projects consists of the specific tasks the marketer needs to execute.
That is why in Nippy we have made it very easy to add and manage campaigns' projects:
- You can create or remove projects in a campaign's form during a campaign creation or add them anytime later. When you add projects in the Campaign form, they automatically assume the campaign's start and end date as the project's start and end date.
- Another way to manage projects and their managers is with Campaign Creator, where you can add and manage completed or project templates. Go to Campaign creator, add existing campaign or create a new one and then drag and drop the projects from the list on the right. Next, you could drag and drop team members to every project and they will be assigned as project managers. More on Campaign Creator management here.
- Add campaign projects in Table manager. Select the row of the campaign, click ADD button and fill-in the required information.
Launch and assign a campaign
To push a campaign in your workflows and assign it to a manager, you need to LAUNCH it. To launch a campaign, you need to fill-in the required fields Name, Start date, Launch date, and End date. If a campaign is not launched, it stays saved as a draft and you can edit it and launch it anytime from the button in the campaign's form.
- Open the campaign's form (edit icon), fill-in the required fields, and press the LAUNCH button when it is active (violet color).

- You can also launch campaigns through the Marketing plan. Go to Marketing plans, choose the plan you want to launch from the dropdown and press the LAUNCH button on the right from the plan's name. When a plan is launched, all campaigns under this plan are launched.
- Go to Campaign creator, load the campaign you need to manage, and click on the launch icon.

Complete a campaign in Nippy
A campaign can be completed manually. You can access the complete button  campaign's form, GRID, or GANTT.
The smart Nippy will notify you if you have completed all projects under a campaign to complete the campaign.
When a campaign is completed, it's projects and tasks, regardless of their status, are removed from all team members' workflows.
When a campaign is completed, you can not edit or change the campaign or its projects and tasks.

Duplicate existing campaign
You can easily reuse a campaign of you think it is very similar to a new campaign you want to create or if you believe that the campaign was successful. When you duplicate a campaign the new campaign is exact copy of the original campaign. Then you can edit any elements of the new campaign.
You can save or launch the duplicated campaign only if you have made changes to the original campaign.
- Open to edit the campaign's form.
- Click on the three dots at the top of the form.
- Click duplicate. Nippy will create a copy of the campaign and you can save it as a draft or launch it after you have made a change.
You can reuse campaign from Grid and GANTT, where you can see the duplicate icon.

Save campaigns as templates
Campaign template is a recording of the exact state of a campaign that has been identified as a best practice that needs to be available in the organization.
When you reload a campaign template, you can edit any of its elements and launch in the marketing workflows.
When you change the dates of the new campaign, all activities under the campaign assume new dates while preserving their relationships.
Edit campaigns in Nippy
You can edit campaigns and their elements in many easy ways in Nippy.
- Wherever you have a campaign name, you will see the edit
 icon. Clicking on this icon will open the campaign's dialog box, where you can edit any campaign element. To save your changes, click UPDATE. If the campaign was saved as a draft, it will be saved again as a draft. If the campaign was launched, it will stay launched.
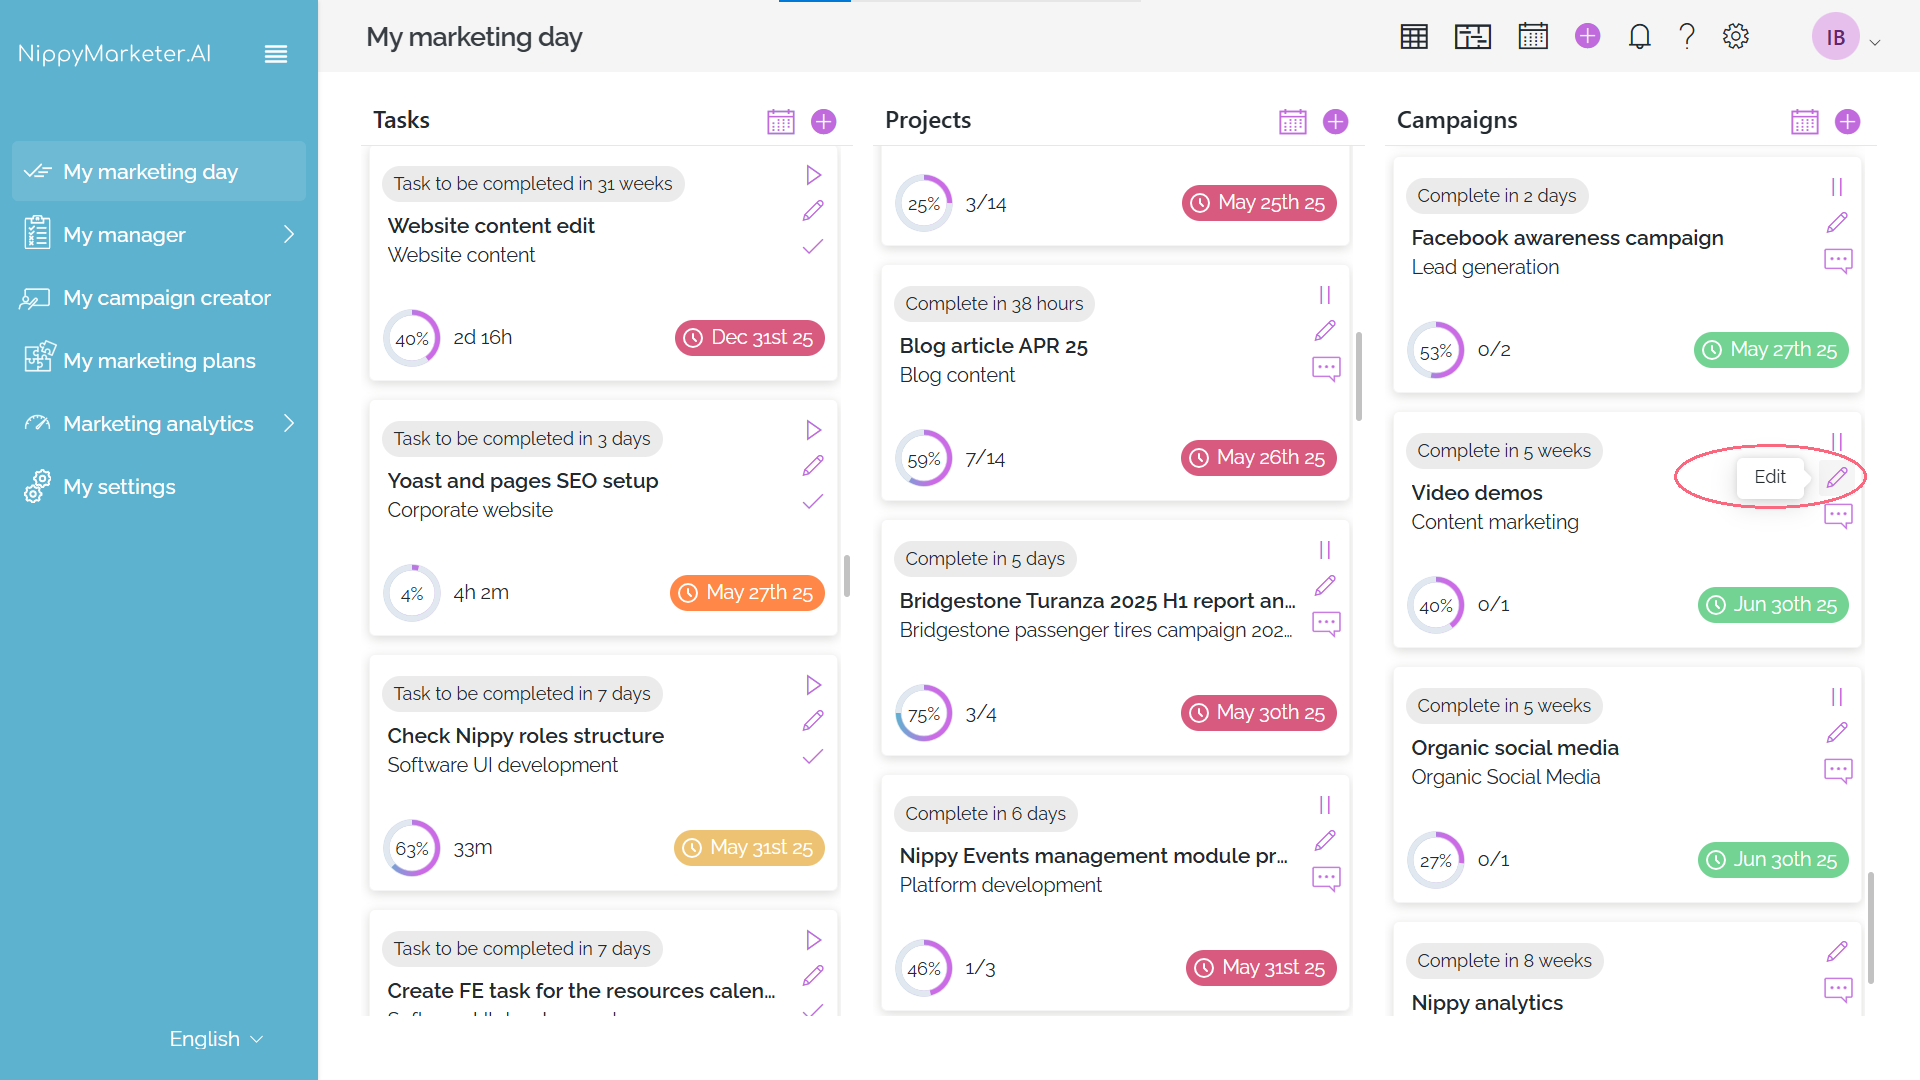
- You can edit campaign elements in table view. Go to My manager, Table. Double click on any cell in the campaign row and enter the new data.
Change campaign periods
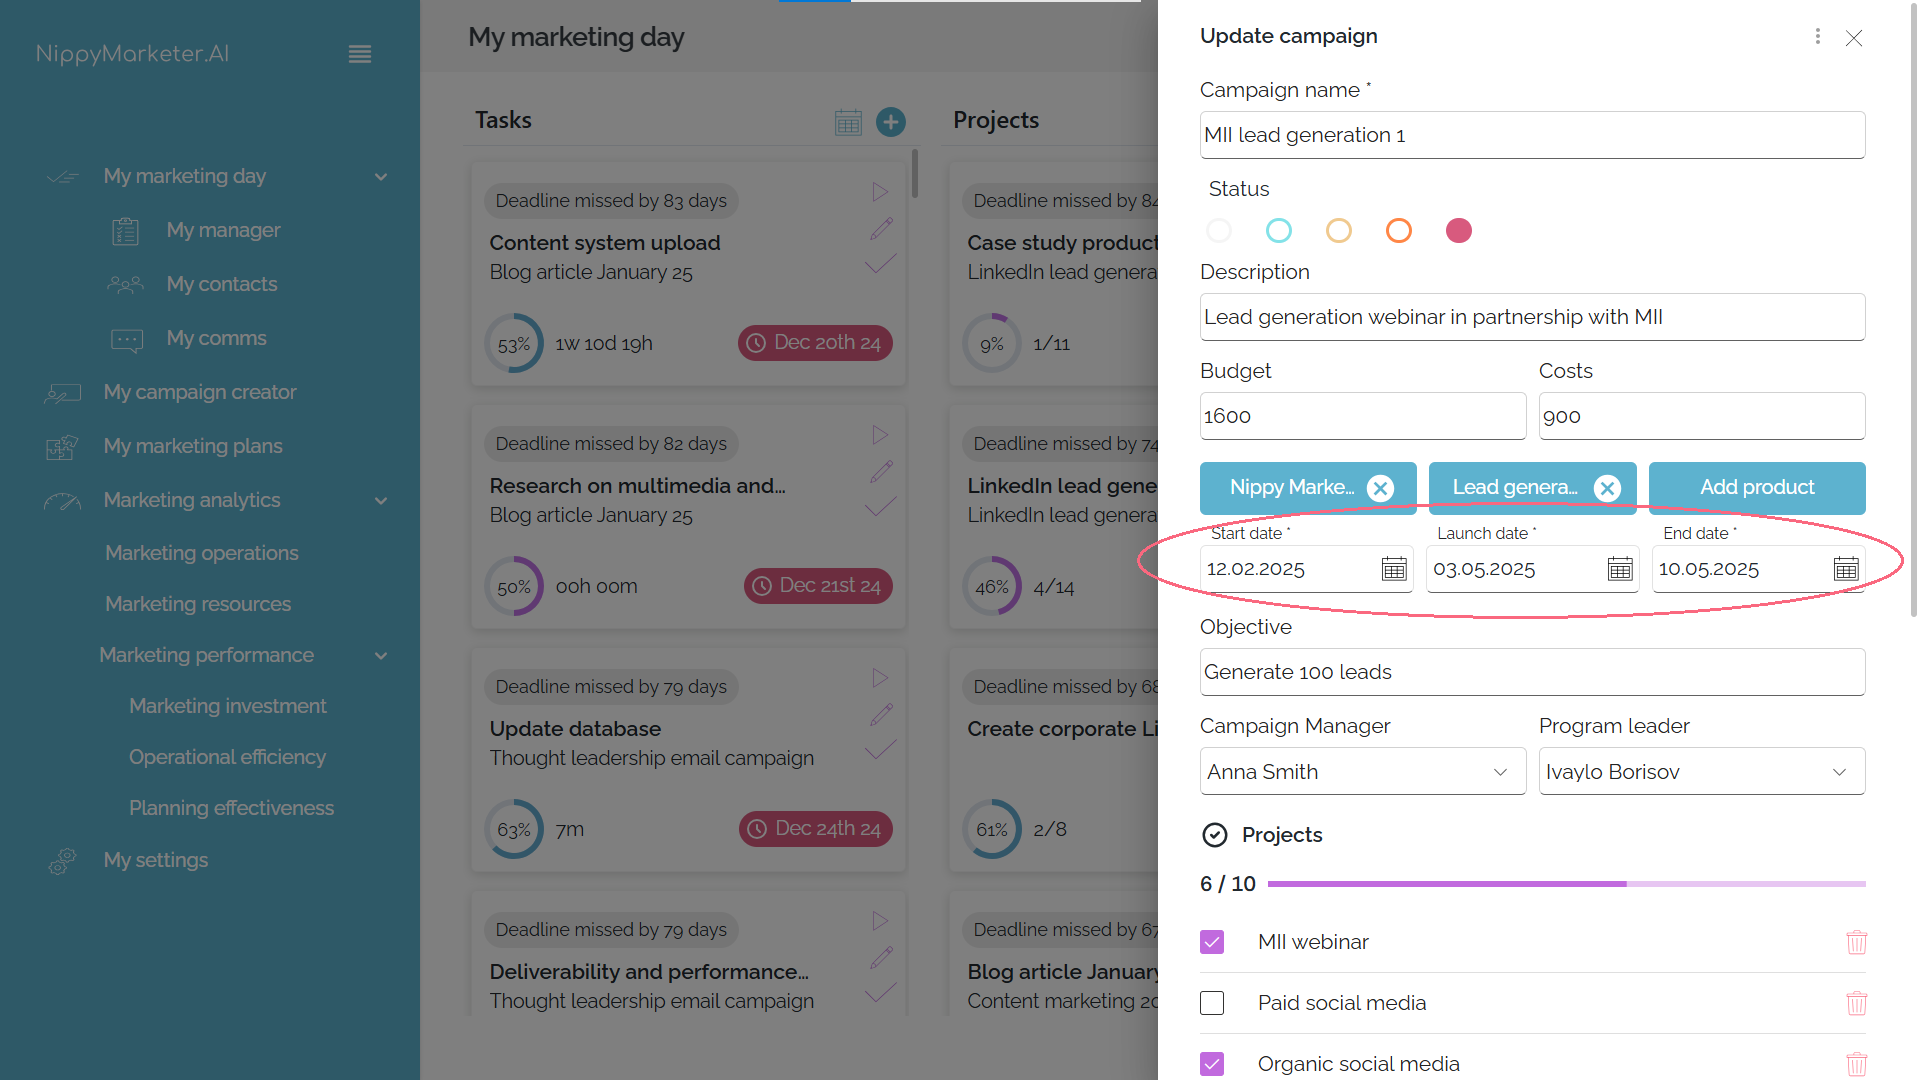
Here are the options to change a campaign's time periods in Nippy:
- Open the campaign's dialog box. Edit dates and click UPDATE.
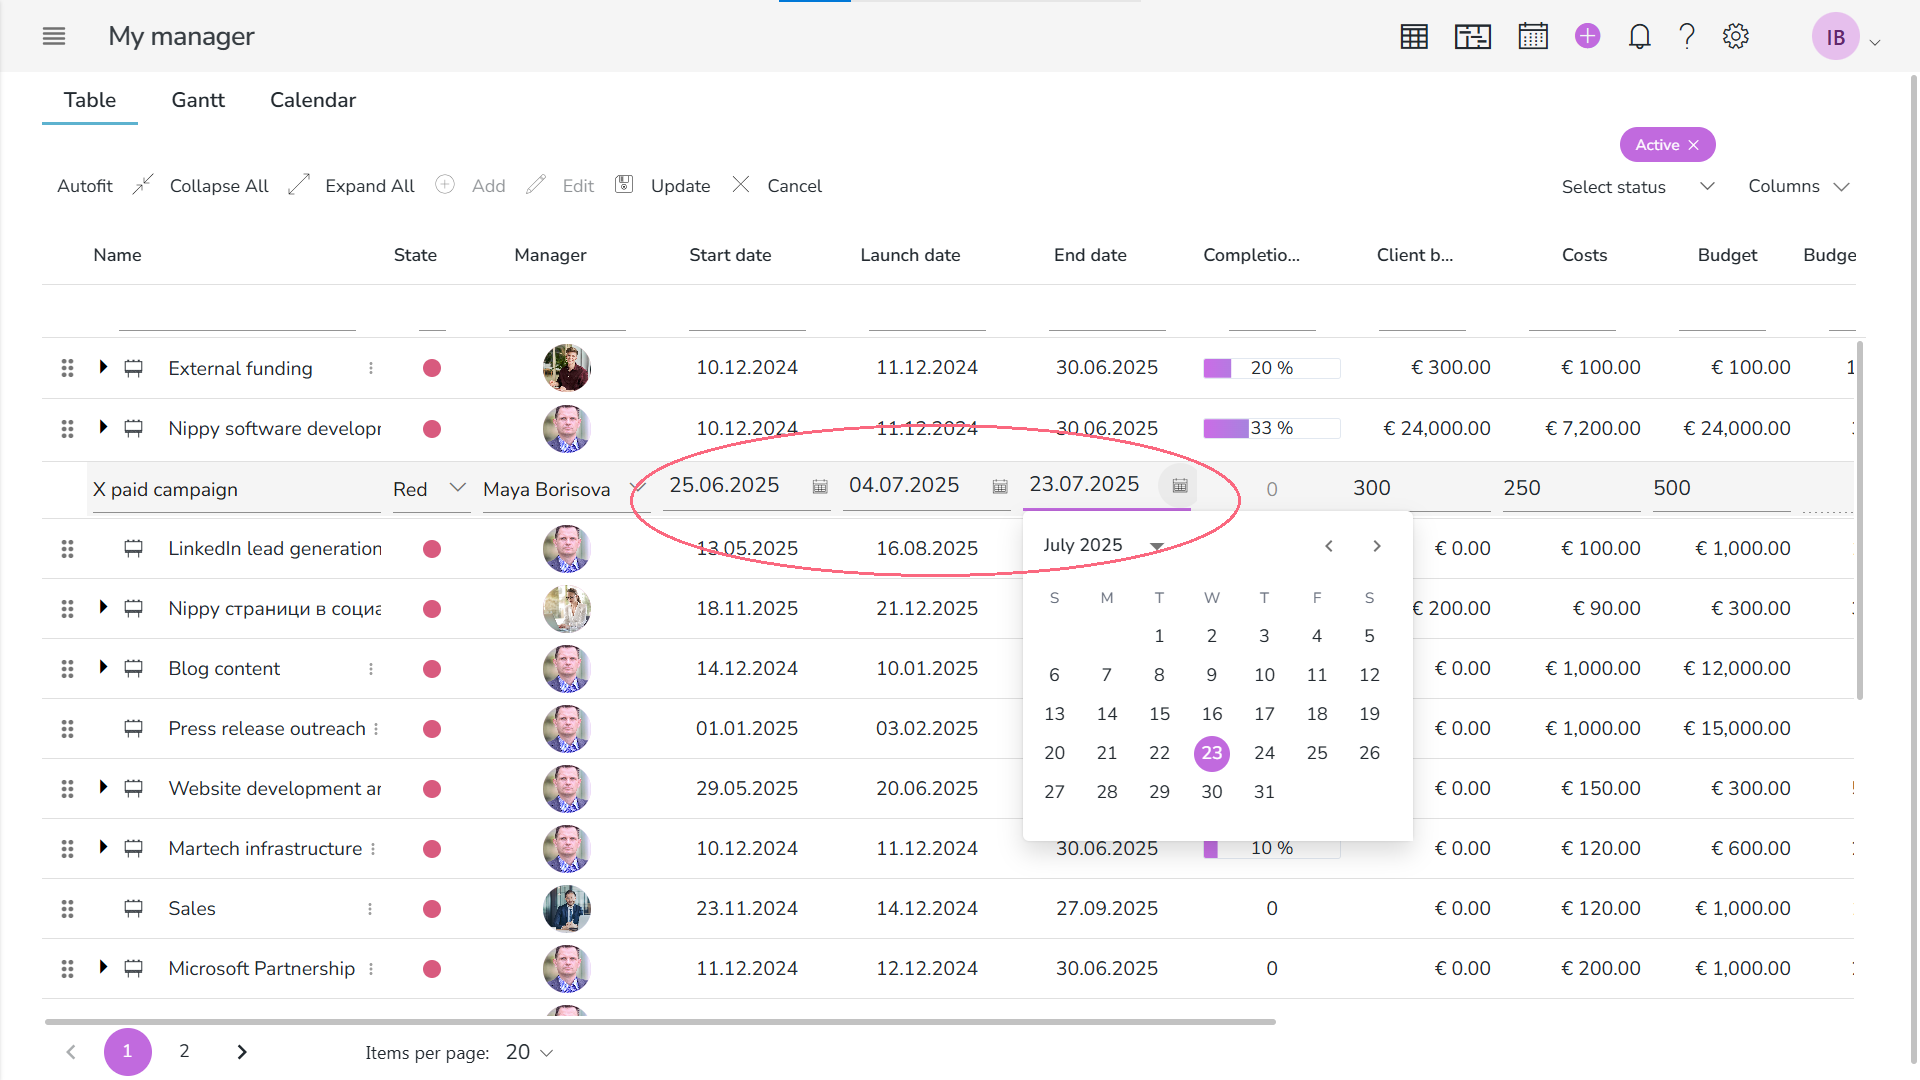
- Go to Manager/Table, find the campaign to be edited, double click on the date cell, change date and click away.
- Go to My Manager/GANTT. Find the campaign row. You can drag the colored bar that indicates the campaign's period between start and end date. All dates will be updated accordingly. In GANTT view you see the start and end date of a campaign.
- Go to Marketing plans, choose the marketing plan that you campaign is part of, find the campaign row and drag the colored cells of the campaign period to the new period. In Marketing plan you see the launch and end dates of a campaign.
Add campaign to a program
You can change the campaign's program in following ways:
- Open the campaign's dialog box. Go to the program selector (the blue button in the middle of the three). Click on the button and add the campaign to a new existing program or create a new program. Click UPDATE.
- Go to Marketing plans, choose the marketing plan whose program you need to edit, go to program's row and click on the plus icon. You will see a list of all campaign in Nippy. Choose the one which needs to be added to this program.
Add a goal to a campaign
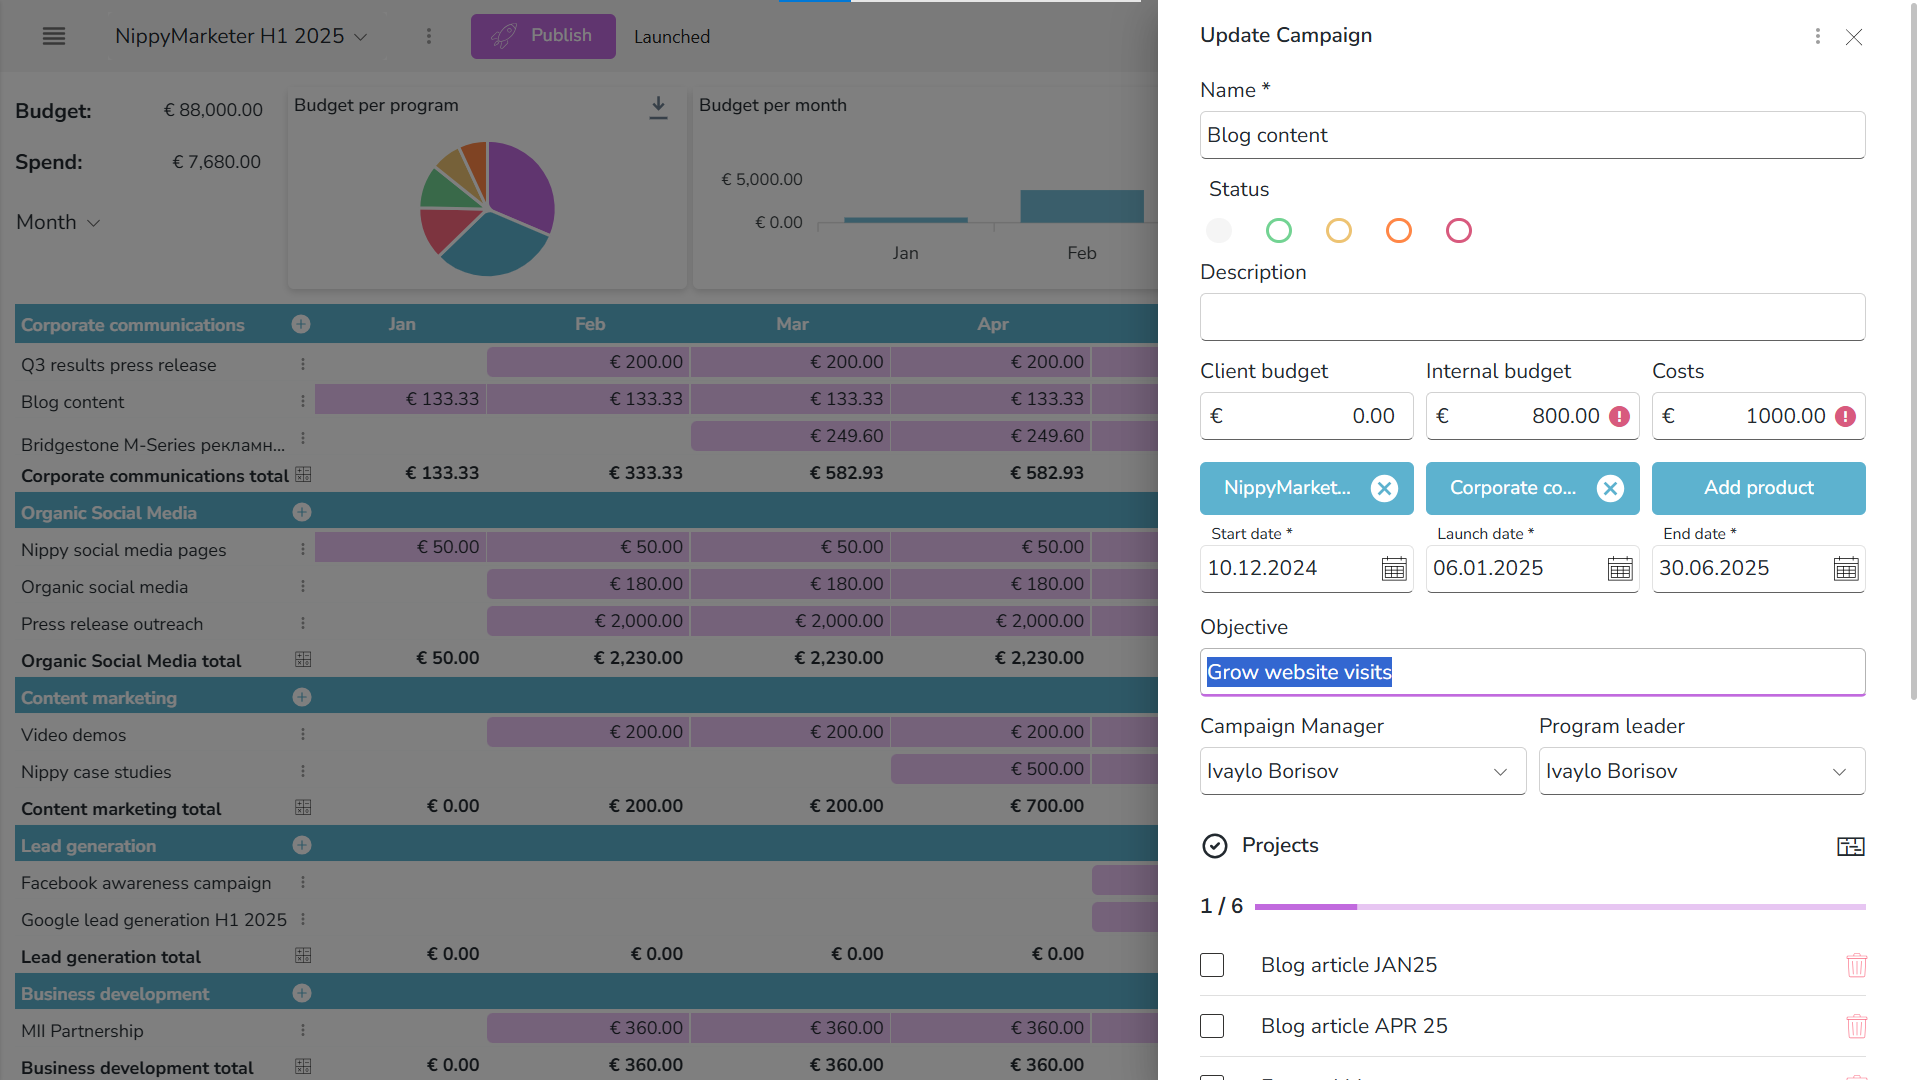
As campaigns are the instrument to implement the marketing strategy, they can have goals. Campaign goals can be determined anytime in the campaign dialog box in the Objective field. You can enter any type of objective.
Manage campaign's budget and costs
Every campaign has a budget. This is the allocated for the execution of the campaign amount. Every campaign has also costs - these are the actual costs accrued during the campaign's execution. Nippy allows for smart management of both.
- You can set the campaigns budget in the campaign's form when editing existing or creating a new campaign. You can also set budgets for each project under this campaign. If the budget amount set in the budget field in the campaign's dialog box is smaller than the sum of the budgets of all projects under this campaign, the cell will become RED.
Campaigns' budgets can be managed in table and marketing plan.
- In Nippy Agency you have the option to set two types of campaign budgets: Customer budget and Internal budget. The former is the approved by the customer budget while the latter is the internally set campaign budget.
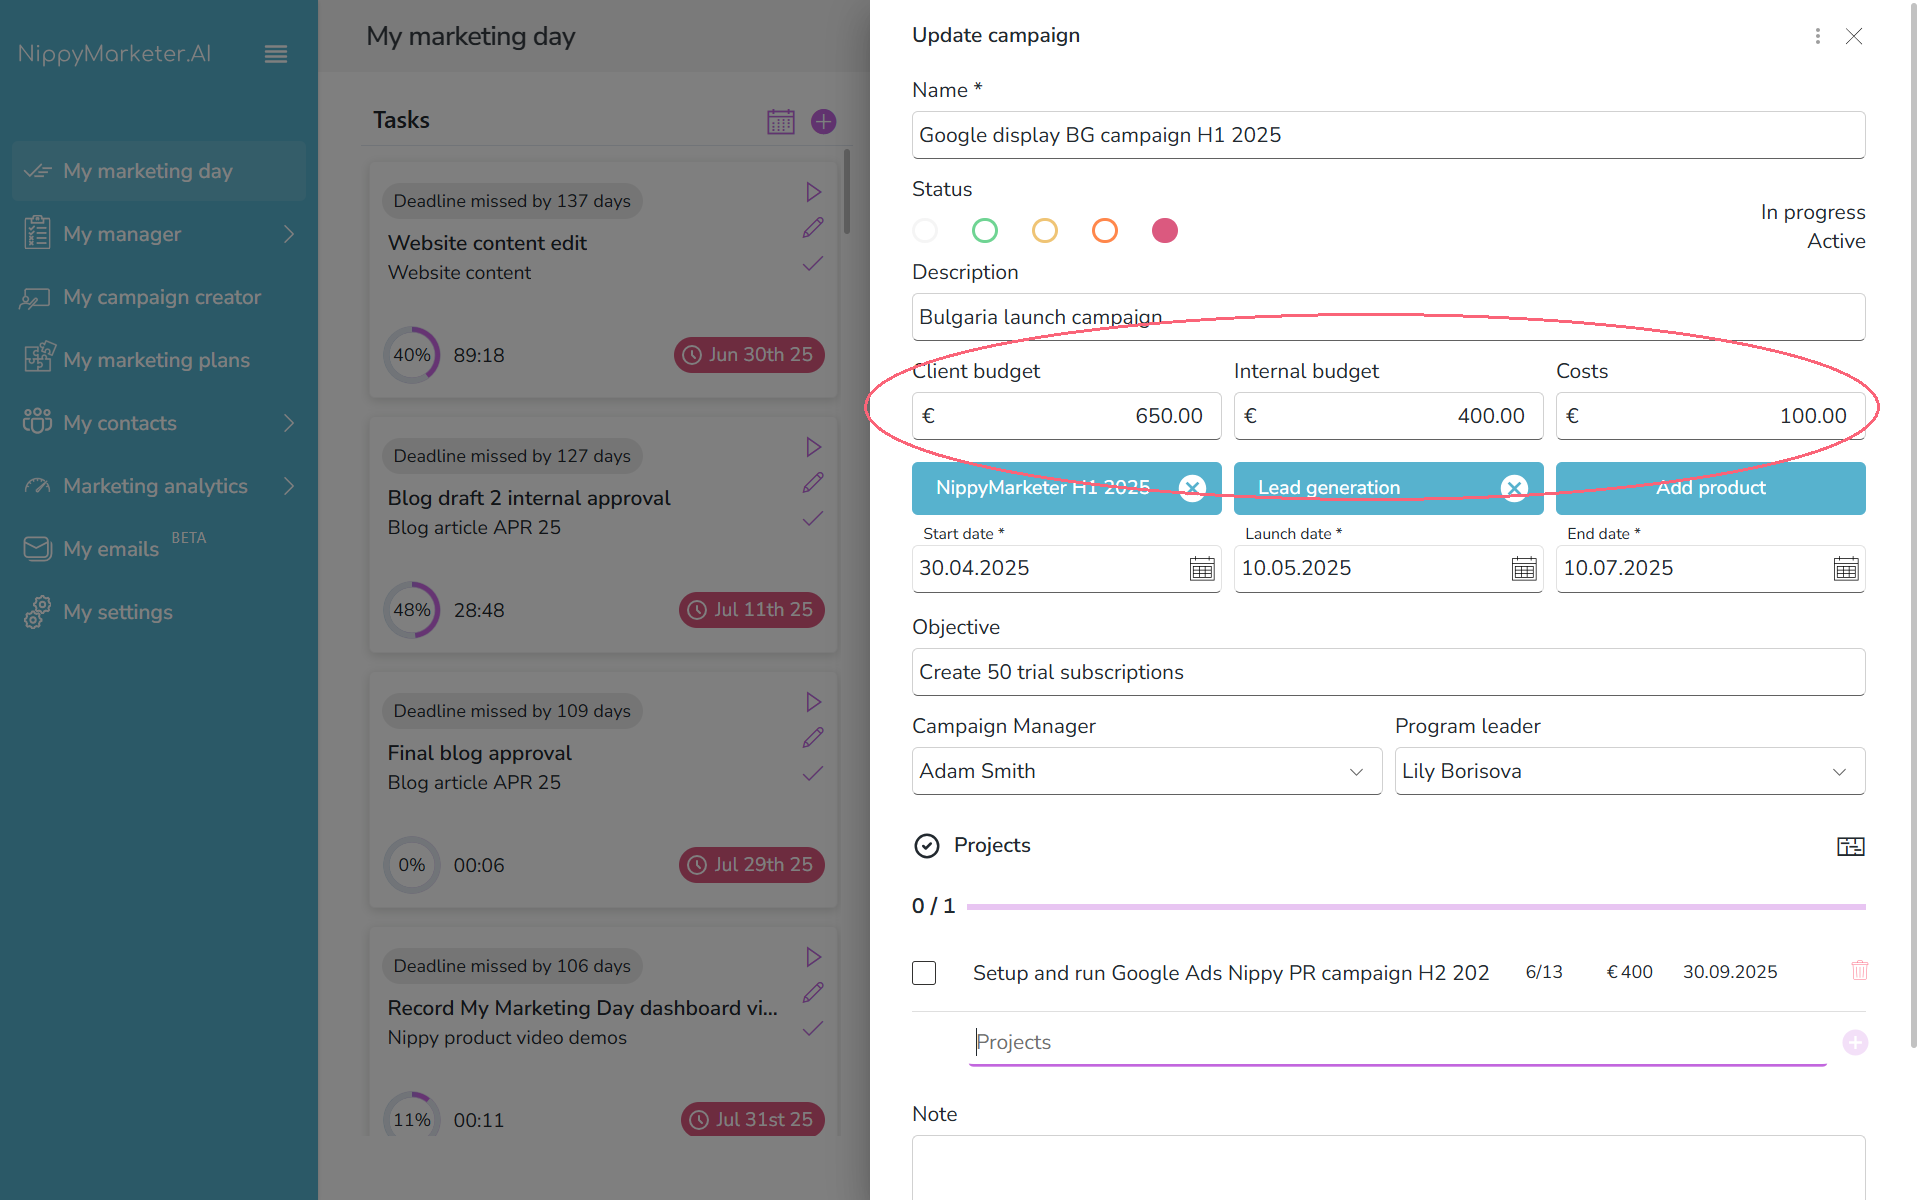
- A campaign's budget can also be set automatically. If you want the amount in the budget field to be determined by the budgets of the projects under this campaign, click the calculate icon next to the Budget field. This will automatically fill-in the resulting sum of the budgets set in all projects of this campaign. You can reverse this action clicking the go back icon. This will show the manually set amount.
Assign campaign manager
At any time during the creation and campaign management you can assign a campaign manager. When the campaign is launched the campaign manager will see the campaign and all its elements in their workflow. You can assign campaign manager from the list of active marketing team members as determined in your marketing team database.
You can assign campaign managers in several ways in Nippy:
- Assign campaign manager in the campaign dialog box: open the campaign's dialog box and from the dropdown menu under Campaign manager choose your team member. Click UPDATE to save the changes.